DevOps Release Note
The DevOps release note is using the work items checked in since the previous deployment. It is only useful if there is more than one release deployed from a branch.
If you only have one release on the branch, there is no track of checked in work items related to the work done to when you create the release.
When the release is created from the main branch, all change sets that was merged from the development branch to the main branch is included but it will not be possible to extract a release note from the release branch as there is only one big change set containing all changes since the last release branch.
The content of a release is possible to view in each release by viewing the Work Items tab, and the release to compare with can be selected.
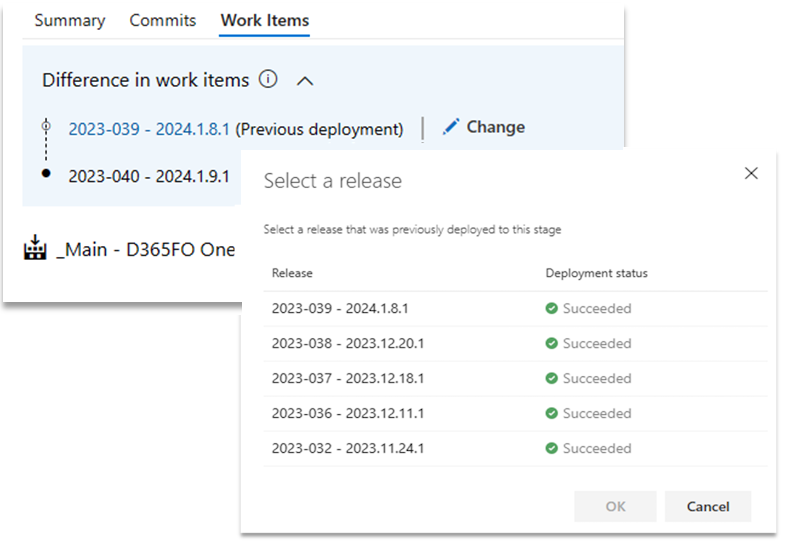
The search condition performed is like the built in selection in DevOps, you select the branch and then compare the releases.
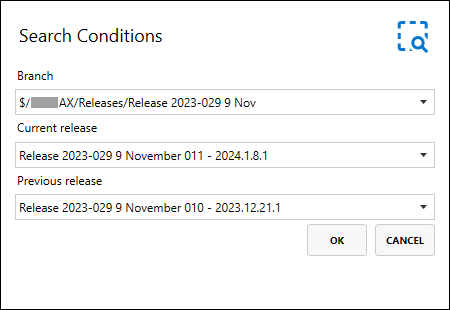
The process is a multi-step process, after you have selected the branch and the releases the compare starts.
All the work items checked in on the release branch will be listed, there is two different uses of this approach, if you are feature complete on the main branch when you create the release branch, the release note based on the delta between the last release branch and the next release is to be considered the release note for the release, the bugs found during the test of the release is not to be considered a part of the release and is only useful for internal use in the project.
If you have a release in production, and fix bugs on the release branch, then the release note based on the deltas is relevant and could be used in the release note.
On the right side of the grid there is a button menu with the following functions.

Select from and to branch.
This brings up the branch and release selection dialog.

View all warnings.
This functions will show all the warnings in the list. A warning is issued for a work item [task] that is in a state that doesn't belong to the Completed or Removed state category in Azure DevOps.

Set the release id.
This button will prompt you to set the release id for the Tag and possible custom field for the release. The release field on a work item is optional and is a custom field, it all depends on you work process if this is used or not, but to set the tag is not an option and must be done.

Verify and update the changes.
This step will verify that the update is possible to do on the work item, and then commit the changes to the work items.

Create and publish the release note.
This step will create the release note and the required queries, and finally deploy the release note to the project wiki.
