Change Sets Work List | Cherry Pick
Overview: The Change Set Work List is a list with change sets ordered in chronological order. The list is created by analyzing the change sets checked in to one branch against the change sets merged to another branch.
This is useful when merging is done from, for example, the Development branch to the Main branch. Change sets in the development branch already merged will be excluded from the list. Forward Integrations (FIs) from the Main branch are also excluded.
The list is typically created and reviewed by the project team (lead developer, project managers) in a follow-up meeting to decide what to merge. If a ‘Cherry Pick’ is to be done, this must be analyzed to eliminate the consequences of possible merge conflicts and so on. All this analysis is done in the DevMethod Tool. The developer responsible for the merge opens the list from Visual Studio and processes the changes sets from top to bottom.
Functionality of Work List Buttons
The work list features three buttons above the grid, aiding in linking change sets to work items and annotating check-in comments. The image below shows the main work list interface:
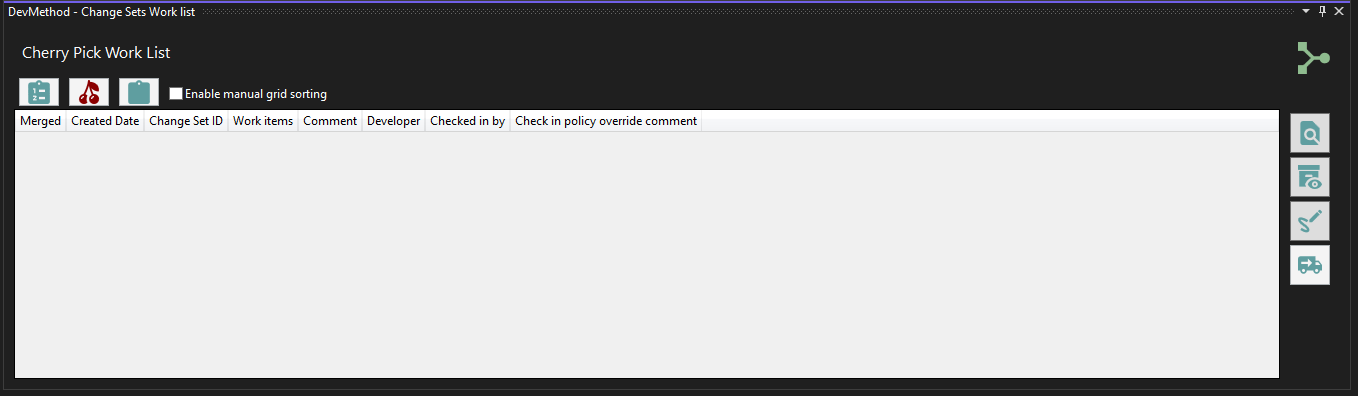
The three buttons on top of the grid help you relate the change set to the work items and set a check-in comment that will link the new change set to the original change set. Their functions are:
- Add the work items related to the original change set.
- Insert a check-in comment that links the new change set to the original change set and refers to the original work items.
- Create a full check-in comment if there is no project related to the change set.
Additionally, four buttons on the right side of the grid provide these functions:
- Find and select a work list.
- Check all the details on the change set; all work items are available and can be opened.
- Create a full check-in comment if there is no project related to the change set (similar to button 3 above).
- Sign off the merge work; this is to be done when all changes are merged.
- Create a “Delivery Note”; this will create a wiki page in the DevOps project with the change sets merged and the related work items.
Merging Process
- Preparation: Confirm connection to the correct repo and project in Team Explorer.
- Accessing the Work List: Navigate to View > Other Windows > DevMethod - Change Sets Work List in Visual Studio. Dock the window as preferred.
- Selecting Work List: Click the Find Work List button on the right side of the grid. Choose an unmerged list (with an unchecked "merged" box) and the branch you are merging from.
- Merge the change set: Merge the code and the project. Check the check mark in the list indicating the code is merged.
- Open the project: Open the merged project. Check that the correct Visual Studio project is selected in the selection combo box.
- Add the related work items: Click the first button on top of the list to add the related work items.
- Add the check-in comment: Click the second button on top of the list to add a valid check-in comment.
Remember, there's no need to use the verify button as the work items are likely closed and may not provide relevant information for this specific merge verification step.
Build the project and check in the code when done. Repeat until all changes are merged. When you are done, open the sign-off dialog by clicking the sign-off button.

Sign off your work.
Fill in a comment in the text box and close the dialog. Then publish the “Delivery Note” by clicking the Publish Delivery Note button.

Create and publish the delivery note.
This button will create the delivery note, which is the list of merged change sets.